Yesterday was dovetails. Today is dovetailing.
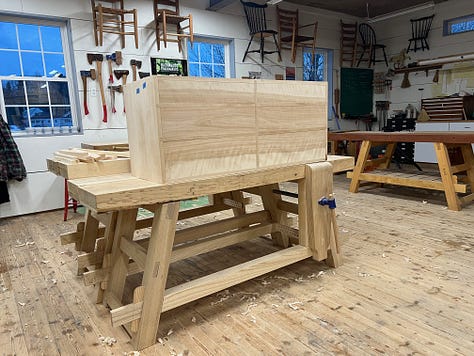
I’m in the middle (late middle, hopefully) of a sideboard build. It’s a dovetailed birch case with six drawers, with curly birch drawer fronts and pine as the secondary wood. The legs are of walnut, with brass and walnut pulls. The case is about 48” long x 20” tall, with the case height determined by maximizing an 18” wide curly birch board. If things go as planned, the drawers *should all be together this afternoon.
*Should hedges for human error. It’s happened before.


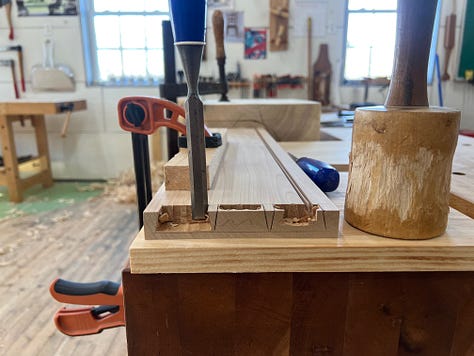
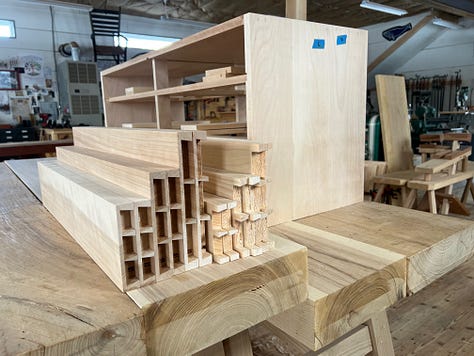
*Images: 1) Assembled case with fronts cut to fit the space and eady for drawer making. 2) Dovetails. Layout, sawn, with the bulk materials removed at the drill press. 3) Pins made, ready to transfer to tailboards.
I built a similar case during my training at the North Bennet Street School about twenty years ago. That was a toolbox build. By the end of it, the dovetail joint was demystified and they’ve lost their preciousness. All NBSS students build one and it’s become an identifying marker out in the wild. They all look similar (and have become more standard with time). Walk through a collaborative shop in the Boston area and they start to jump out.
These past couple days, all the cutting and chopping dovetails had me thinking of my training. I first learned dovetails from Brian Weldy (now the head of the Joiners Shop at Colonial Williamsburg). Then from Dan Faia (furniture maker and instructor in Rollinsford, NH).
Brian was a wonderful first instructor as I got into this trade. He noted good work and made mention when the craftsmanship needed improving. There was no “good enough.” He saw what needed to be addressed and pushed towards making it better. There were no empty compliments.
Students at NBSS were trained to cut the pins first and that approach still feels most natural (though sometimes the project dictates tails first). I’m uninterested in the pins/tails debate. Leave that argument on the old chat boards. I see the merits of starting with the pins… though I second guess my method every time I watch Megan Fitzpatrick flawlessly cut the joint beginning with the tails.
In making the dovetailed drawers from pine, the first step was sharpening all my chisels and passing a file over the teeth of the dovetail saw (it was past time for a touch up). The birch case left them all in need of attention. There’s the old quote by President Lincoln that is pertinent here, “If I had eight hours to cut down a tree, I’d spend six hours sharpening my axe.” The softness of pine always requires such preparation.
I share a few pictures of the layout process below. It’s simple and adaptable. Before starting, I made a few choices on sizing/spacing and the amount of tails. Here are my preferences for the pin board:
I like a heavier half pin (the ones on both ends) and a narrower middle/full pin. In this example, the outer half pins are 3/8” and the full pins are 1/4”. This is both visual and practical The heavier half pin allows for a little planing (if necessary) after assembly without visually throwing it out of balance.
Dovetail ratio 1:6
I like an odd number of tails whenever possible. I layout for three tails on the board below.
I like small pins. This requires that the tails come off the saw since a chisel won’t fit into the sliver of space to make minor adjustments. The squishiness of the pine helps here.
The objective: achieve equally sized tails that are visually pleasing with little math.
Process:
Layout the outer pins (3/8” on the above board).
I’ve decided upon 1/4” full pins. To layout the full pins, mark an 1/8” from the inner line of the 3/8” half pins. (The 1/8” is half the width of the full pin. If the full pins were 1/2” wide, I’d mark 1/4” from the line). Carry one mark along the edge of the board.
Since I want three tails, I’ll place the rule on a number divisible by three, with the 0 point on the mark and the 9 on the extended line. Make dashes at 3 and 6 before carrying those marks up to the knife line. The marks are the center of the pin.
After carrying the mark up the knife line, move 1/8” in both directions to get the full pin. The line is marked parallel to the edges on the board’s face, and the flared angle is marked on the end grain. Mark the waste. Ready to saw.
I followed this process for the drawer fronts and backs. The backs all use the same size pins (3/8” for half pins, 5/16” for full). On the birch fronts, the half pins at the bottom are 1/2”, they’re 7/16” in the middle, and are 3/8” for the top drawer. Center pins are all 1/4”.
The shop has a good scent these days. Now, back to cutting pine.


I really need to take some classes rather than doing things the hard way! Great piece!
Looks great. May is ask, why birch for your primary wood?