
In pursuit of sticks
post-and-rung prep...

There’s a class in the shop this week. Plenty happening…lots of wet, funky red oak shavings stinking up the space. I love seeing the barrels of fresh shavings at the end of the day.
Our first order of business was to make some parts. I spent the past week or two making posts and rungs (and we’ll replace many of them with our efforts on the first days of class). There’s a cooking show element to my greenwood classes…we make a stack of wet rungs, then, as needed, pull the dry pre-made sticks from the kiln.
With all the stick making happening, I thought I’d share the process in making them. It’s essentially the same for a post or a rung. (I know - I can guess what you’re thinking that this may be the dullest of all the dull posts I write…making sticks…but this is at the heart of post-and-rung chairmaking)
I’ve shared it before; this is the case for purchasing veneer-grade or clear materials. It’s most likely to yield straight-grained parts with less knots and other issues to work around (or, in some cases, to work into the chair). For most of my chairs, straight grain is preferable. All parts have the same objective; having the grain run uninterrupted from one end to the other. This produces the strongest parts for chairmaking.
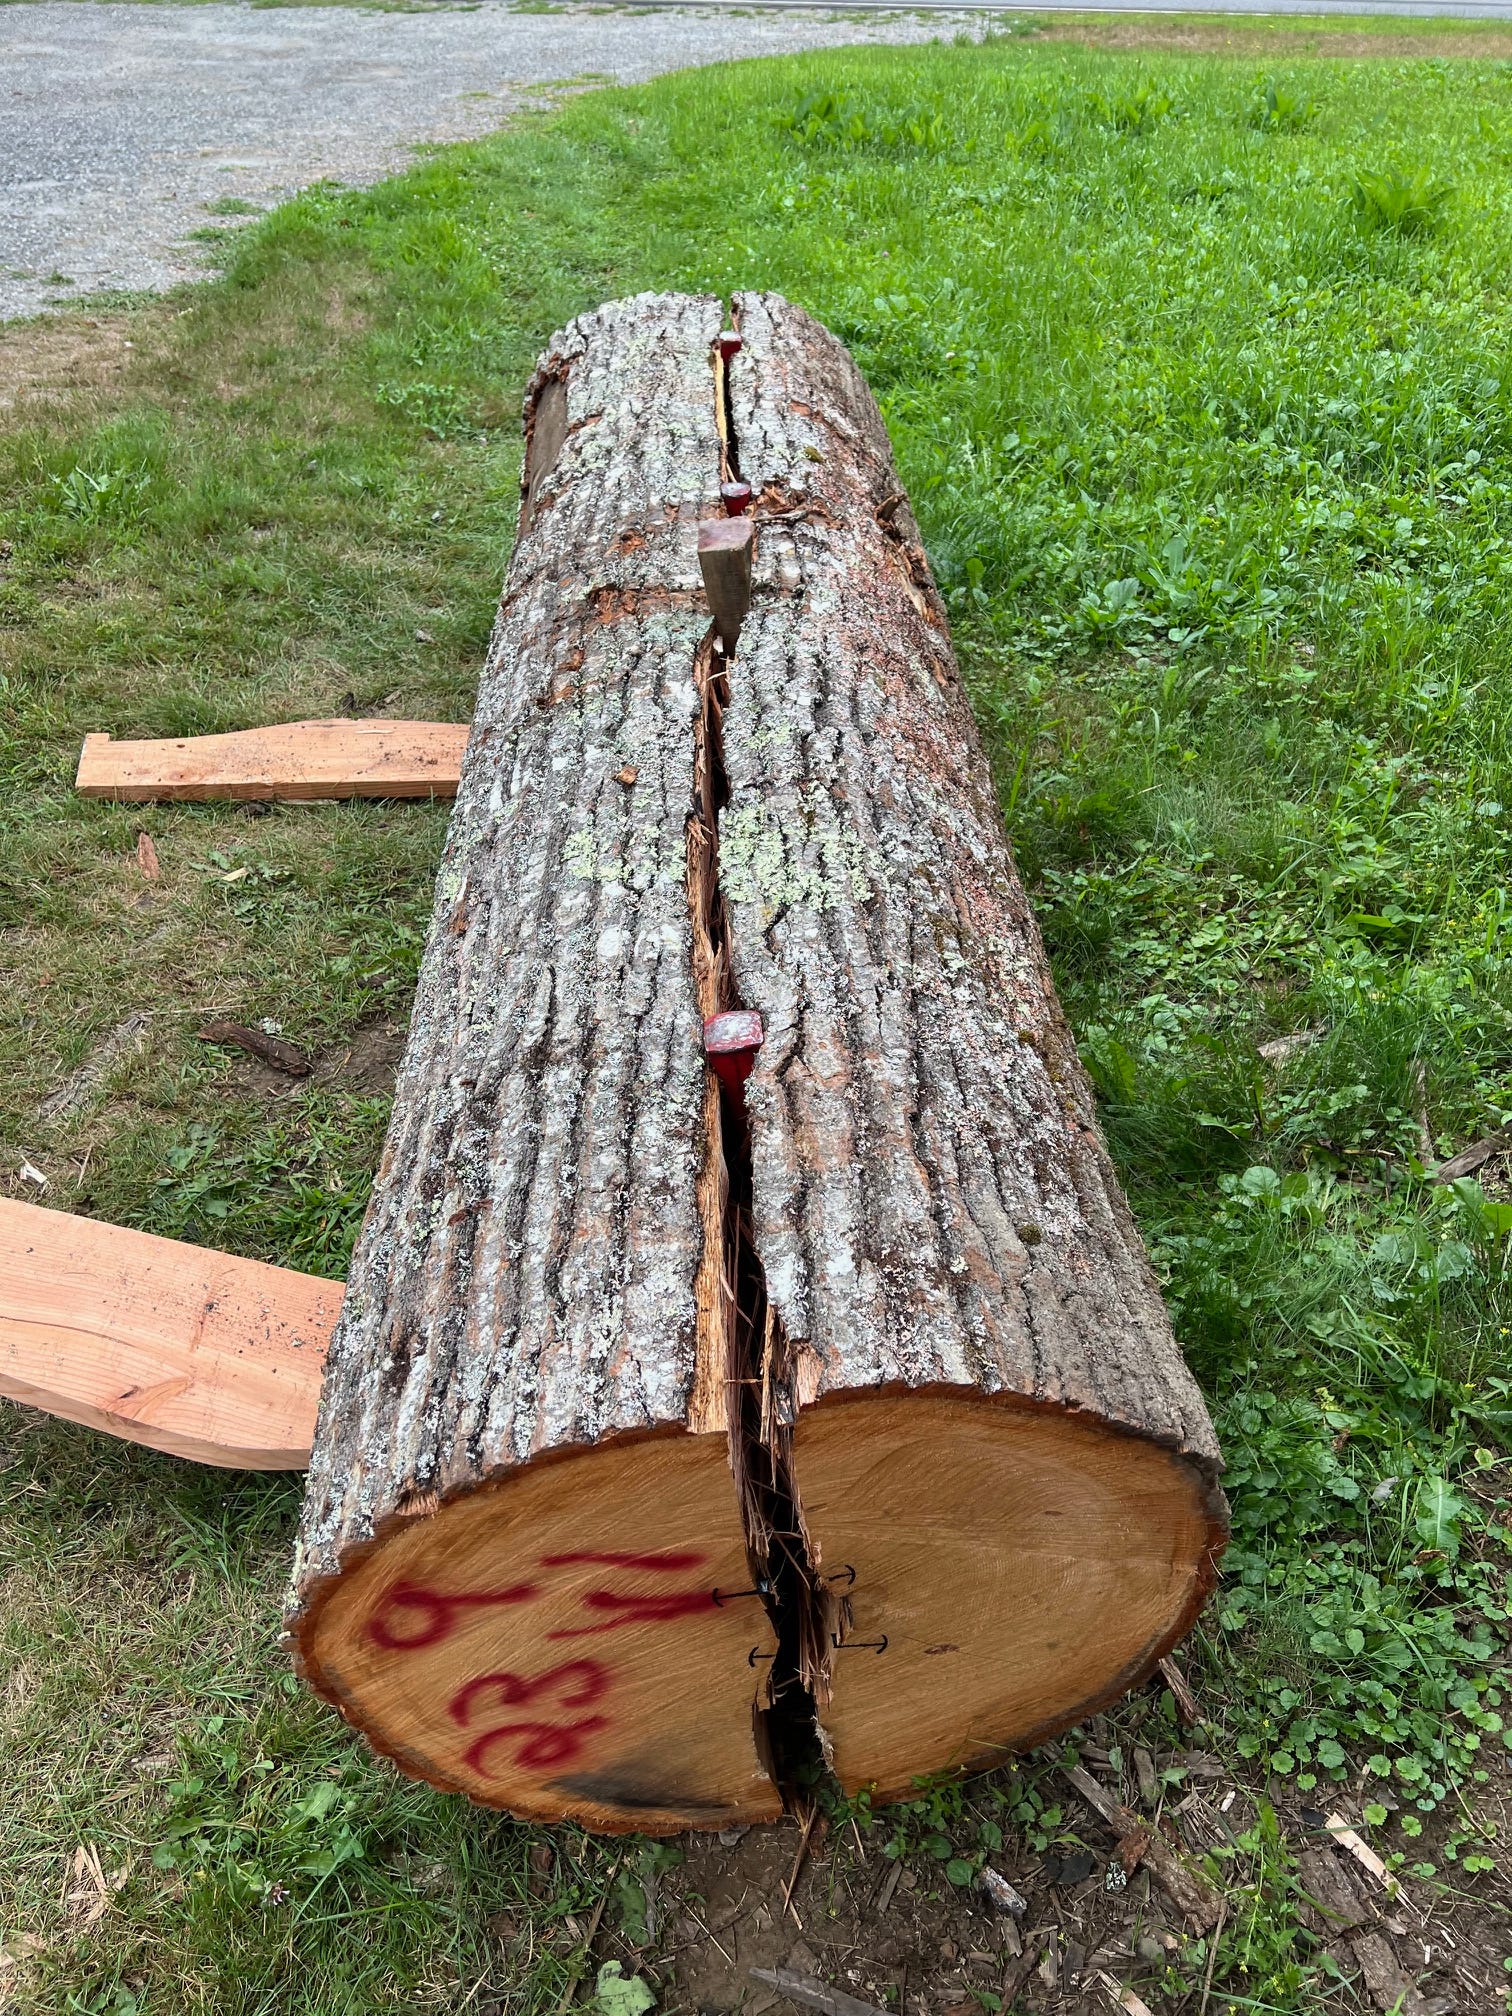
From there, it’s cutting a section to length. I usually pull my posts from the lowest section of the log. This part of the log naturally swells as the tree transitions to its root system. That movement isn’t ideal for rungs (it makes sticks with a bow or banana) to them. But it’s just fine for any part that will end up being steamed and bent. The sweep is reshaped once the post flexes to the form. In this way, bent parts are more forgiving. And for timber with sweep or movement, I try to make them into bent parts wherever possible.


To make the parts (either posts or rungs), each follows a similar path. Parts are knocked out of the log slightly oversized, with the hopes and intention of the splits following the fiber lines. Better splitting means less, and easier, effort at the shavehorse.
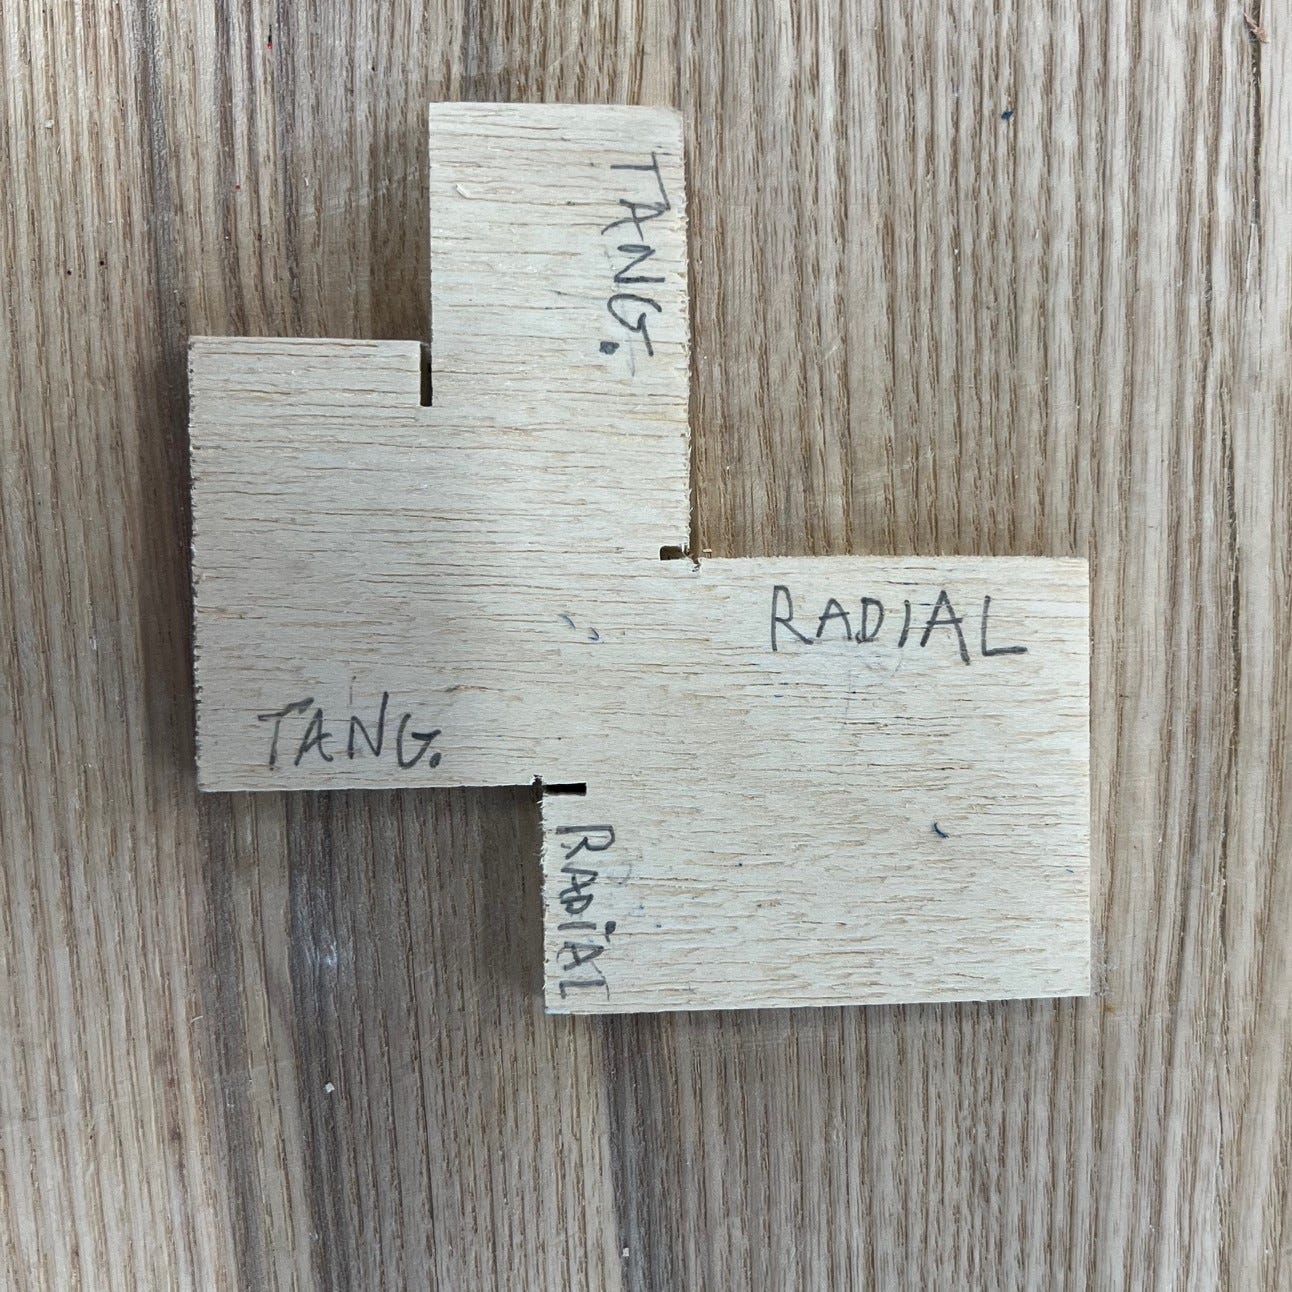
There are two distinct planes (or faces) to recognize when making the parts. Greenwood chairmaking has its own language, but the faces are recognizable to anyone who has shopped at the lumber yard.
Tangential faces (lumber language; flatsawn)
Radial faces (lumber language: quartersawn)
In making parts, there are a few things to consider. The wood is wet - sopping wet in the case of the current log. Wood shrinks as it dries, and the tangential plane will shrink more than the radial. That means a part shaped into a square while wet will shrink into a rectangular shape as it dries. That’s not a problem, just something to keep in mind when shaping parts.
I’ve found that the distortion-while-drying is a draw to some chairmakers, while others find it an issue that needs to be remedied. I fall somewhere in the middle. I accept some variation within my parts, but attempt to minimize the radial/tangential differences where they are most noticeable. The greatest distortion happens on the largest parts, meaning the posts see the biggest changes during drying. I use a simple notch block when making chair parts that takes drying distortion into consideration:
I’d like the front and back posts for the lounge chair to be 1 5/8” square once the posts dry. Knowing the tangential face will shrink more than the radial, the notch is slightly longer on that tangential face…closer to 1 3/4”. The intention is to allow the post to “dry into square.” (or at least closer to square)
Through photos, the basic process for making rungs looks something like this:


The process for sticks is straightforward. Follow the grain; if the grain runs straight, the stick should run straight. If the grain bows or twists, then the stick should bow or twist. (To make a rung from material with twist or movement, add some mass/bulk to the parts to account for the grain runout).
Posts have another step. Before taking off the corners to make the octagon, they are tapered into the desired profile. Making octagons (or the preferred shape) is the last step.
This process, over and over, and then over and over again. Time on the shavehorse and with the material. It’s one huge draw towards green woodworking.
I tell my students often, this technical side of furniture making isn't very interesting but it makes us better makers. Keep sharing it, please.